Custom Assets
Editing FSMs all day and night is nice and all but it isn’t very useful if you want to add anything completely new to the game. Today, we will learn about the magic of assetbundling and get you started on making your own mod in Unity! And to make things even more interesting, I will guide you through adding your own custom enemy into the game.
What you will need
Note
In the Unity installer, make sure that you choose to install build support for Windows, Linux, and Mac.
AssetBundles
Assetbundles are a form of archive file that allow us to export our Unity content and import them into our game while it runs. This means that we can make whatever we want in Unity and tranfer that into Hollow Knight.
Assetbundling non-scene stuff
The easiest way to manage assetbundles is through the Assetbundle Browser. After creating a Unity project (in 2D mode), simply drag the extracted Assetbundle Browser folder into your Unity project’s Assets folder. After it loads, this should create an “AssetBundle Browser” option when you open up the Window list as seen in figure 1.
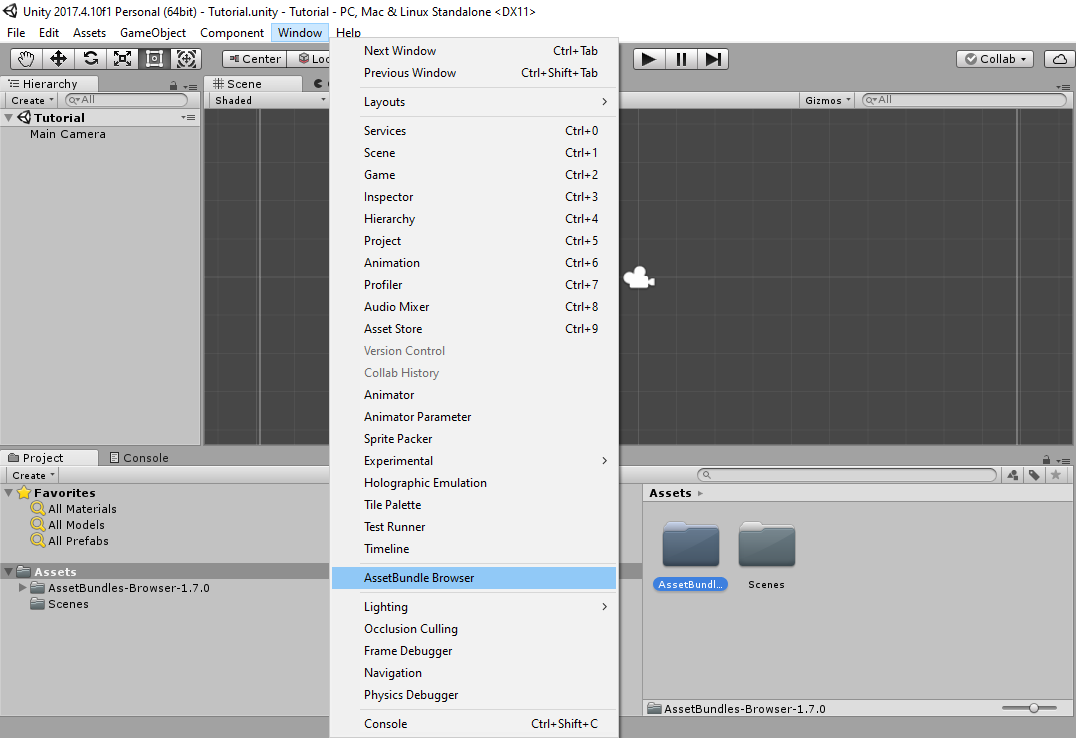
Figure 1: Notice the AssetBundle Browser option in the Window list.
Creating our enemy in Unity
Before we can assetbundle anything, we need to have something to assetbundle, I will be recreating the Armor Lord from Symphony of the Night but you can do something else.
I’m assuming you know how to use Unity so I will only a give a few tips/warnings.
- When you are changing the spritesheet settings after you import, be sure to set Filter Mode to Point if you are dealing with pixel art, otherwise keep it at Bilinear.
- If your spritesheet is very large, be sure to change the Max Size option to a higher amount.
- In my experience, managing the Animator Controller is very annoying so don’t do anything with it, just create your clips and run the different animations through code (i.e.
_anim.Play("Animation")) - ModCommon has extensions that are useful when working with the Animator component (IsPlaying(), PlayAt(), and GetCurrentFrame()).
When you finish, create a prefab of your boss by dragging it from the Hierarchy menu into one of your project’s folders.
Creating the assetbundle
Open the AssetBundle Browser menu (Window -> AssetBundle Browser). You should see the screen in figure 2.
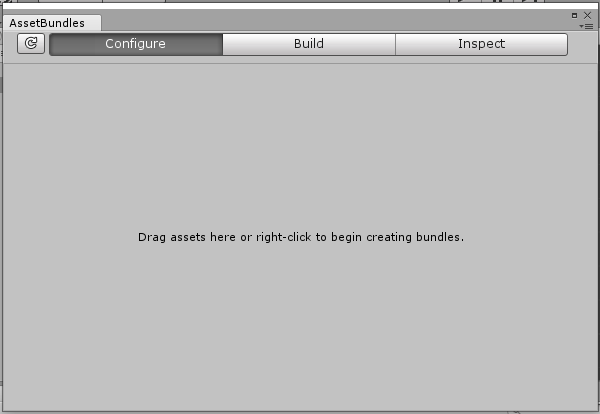
Figure 2: The AssetBundle Browser window.
Right click on the window and select “Add new bundle.” I will name my bundle “lordbundle,” but you can choose something else. Now drag your prefab or any other asset you want to export, into the bundle you just made.
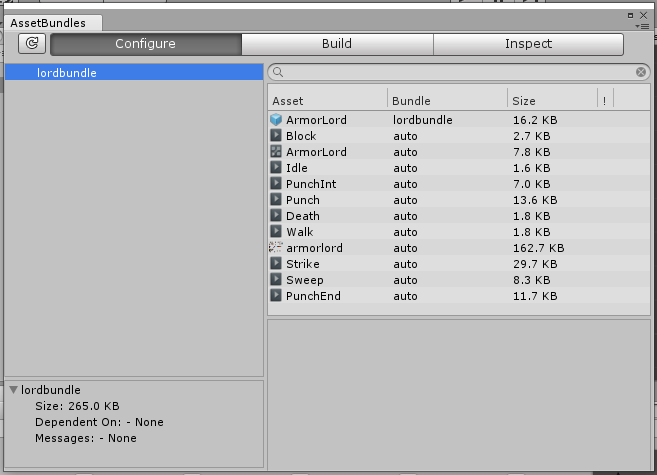
Figure 3: Your window after you drag your content into it.
Head over to the Build tab of the window and choose your modding project’s directory (or a folder in it) as the Output Path. The Build Target does not matter unless you bundle shaders, in which case, you will need to build separate assetbundle files for Linux, Windows, and Mac. Click build and wait for the magic to happen.
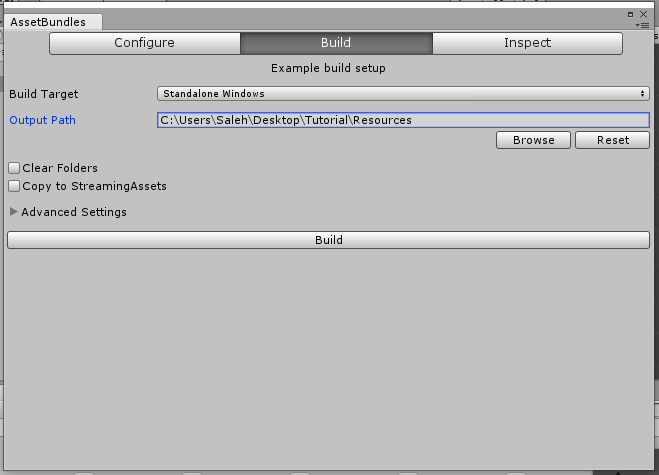
Figure 4: The build tab of the Assetbundle Browser.
The AssetBundle Browser will create multiple files once the building is done but you only need the file named after your bundle, in my case it is “lordbundle.”
Note
Unity does not assetbundle script files so you will need to add those using AddComponent<T>() in your mod’s code.
Loading assetbundle into Hollow Knight
Add your assetbundle file as an embedded resource to your project by adding the following to your project’s .csproj file.
<ItemGroup>
      <EmbeddedResource Include="path-to-file-in-project\lordbundle" />
</ItemGroup>
Read the assetbundle using Assetbundle.LoadFromMemory(), like so:
string bundleN = "lordbundle";
AssetBundle ab = null;  // You probably want this to be defined somewhere more global.
Assembly asm = Assembly.GetExecutingAssembly();
foreach (string res in asm.GetManifestResourceNames())
{
   using (Stream s = asm.GetManifestResourceStream(res))
   {
         if (s == null) continue;
         byte[] buffer = new byte[s.Length];
         s.Read(buffer, 0, buffer.Length);
         s.Dispose();
         string bundleName = Path.GetExtension(res).Substring(1);
         if (bundleName != bundleN) continue;
         Log("Loading bundle " + bundleName);
         ab = AssetBundle.LoadFromMemory(buffer); // Store this somewhere you can access again.
   }
}
Or for an easier approach, use Assetbundle.LoadFromStream():
string bundleN = "lordbundle";
AssetBundle ab = null; // You probably want this to be defined somewhere more global.
Assembly asm = Assembly.GetExecutingAssembly();
foreach (string res in asm.GetManifestResourceNames())
{
   using (Stream s = asm.GetManifestResourceStream(res))
   {
      if (s == null) continue;
      string bundleName = Path.GetExtension(res).Substring(1);
      if (bundleName != bundleN) continue;
      Log("Loading bundle " + bundleName);
      // Allows us to directly load from stream.
      ab = AssetBundle.LoadFromStream(s); // Store this somewhere you can access again.
   }
}
Loading content from bundle
There are different methods for loading our assets depending on what we want to do.
The simplest is the method ab.LoadAsset<T>("ObjectName") which allows us to load a single Unity object that we want(audioclip, prefab, shader, material, etc.)
based on its name. So to load the Armor Lord prefab I made, I could do ab.LoadAsset<GameObject>("ArmorLord").
Another useful method is ab.LoadAllAssets<T>() which returns an array of all your assets that are type T.
If I had a bunch of materials that I wanted to store, I could do ab.LoadAllAssets<Material>().
There is also a non-generic version of this method that will load all the objects in your bundle into an array.
You can add Async to the end of these methods to continue through your code without waiting for the assets to load.
Using our loaded stuff
Not much here since you do all this as you normally would. Instantiate your prefab, set its position, make it active, add your MonoBehaviour to it, and so on. But there is something important you still need to do so read the Warning.
Warning
For some strange and stupid reason that only the greatest of Unity gods will ever fathom, Unity loses the link between a gameobject and its material in SpriteRenderers.
Thus, if your gameobjects use a SpriteRenderer component, you need to link them back to the material with something along the lines of
go.GetComponent<SpriteRenderer>().material = new Material(Shader.Find("Sprites/Default"));. The shader inside the new material’s constructor depends on what you chose so don’t just copy this.
Note
You need to add the Hollow Knight specific stuff here as well such as the DamageHero and HealthManager components as well as set the gameobject’s layer to 11.
Armor Lord Example
Code I used to load the prefab.
AssetBundle ab = Tutorial.assetbundles["lordbundle"];
GameObject go = Instantiate(ab.LoadAsset<GameObject>("ArmorLord"));
go.SetActive(true);
go.transform.position = HeroController.instance.transform.position;
go.GetComponent<SpriteRenderer>().material = new Material(Shader.Find("Sprites/Default"));
go.AddComponent<ArmorCtrl>();
AssetBundling Scenes
This video guides your through how to create and assetbundle a scene.
Note
You do not actually need the AssetBundle Browser; there is a way to assetbundle without a GUI. The video does not cover it since this is much more user-friendly.
Note
When making the hole for my scene in blender, I use vertex selection but it’s much better to select and delete faces instead.
Note
SFGrenade has made a Unity extension that rounds the points of the boxcollider for you. You can find it here.
Note
I make a mistake at 21:45 because I leave a gap in the gateway, allowing the player to potentially dash through the top and go outside of bounds.